 Home
Home
 Tips and Tech
notes.
Tips and Tech
notes.
|
Home
|
Tips and Tech
notes.
|
RobbMc is the design engineer at Erson primarily response for their design. He also fights production problems.
Bob S is this site's owner.
Doug (who posts on the FE Forum as "Doug aka pumpbldr") His company's site is Precison Oil Piumps
Dennis owns DCS MotorSports
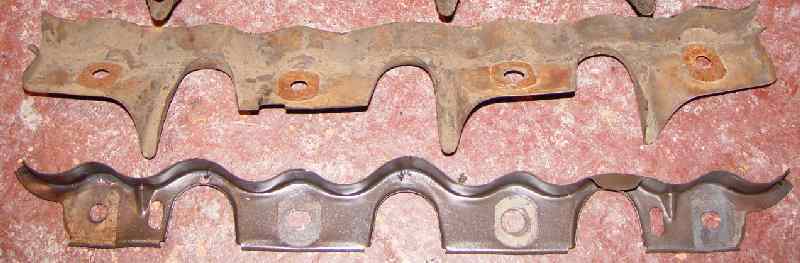
Q: Dip Trays?
RobbMc: The Erson rockers were designed to be used without the drip trays. You will need to run another type of valve seal other than stock when you remove the drip trays. You can machine the guides for positive seals or add the floating seals, umbrella shields, etc.
Bob S: I would still try to fit some drip tray as drip trays help to keep the valve covers from filling with oil. Two issues about that: 1) dropping the amount of oil in the pan as the valve covers fulll up and 2) oil staying over the valve cover gaskets so you have to worry about oil leaks.
Q: Installing my new Erson roller rocker arm assemblies as I recieved them on one side, the oiling holes in the shaft ended up facing up, while on the other side, the holes were facing down. Which is correct?
RobbMc: For this design with needles bearings, it does not matter about the oiling hole orientation. Either up or down will work equally well. This is due to the needle-bearing design, unlike a stock or stock-type shaft system. But if someone twisted my arm and made me pick a direction I guess I would say to run them with the holes down towards the head. Why? I can't think of any real reason but we are assuming someone is twisting my arm remember? I guess just to be consistent with stock rocker shafts.
Q: I have a few questions regarding the shim and sleeve kit (E913020) that I received today with my Erson rocker assembly (E918502).
1. The kit suggests it is for the Medium-Riser. I assume that it is also applicable for the Edelbrock heads?
2. When I pull the rockers off of the shafts, will the needle bearings be prone to fall out?
3. Which rockers usually need to be shimmed and is there a known distance that a given rocker needs to be moved for the Edelbrock heads?
4. The instructions say that the spacer sleeves provided in the kit are 0.125" shorter. I measured the shims to be just over 0.3" in thickness. Does this imply that a total of 4 shims will be needed to take up the slack caused by the shorter sleeve regardless of the final position of the rockers?
RobbMc: The shim kit was originally designed for the medium riser heads. The shim kit existed before we knew about the Edelbrock heads having a different valve spacing.
The spacer sleeves that come with the shim kit are narrower than the standard spacer sleeves which allows room to move shims around to get the rockers where you want them.
Install the rockers as delivered and see which rockers need to be moved and how much. If the rockers are within .031" of being centered on the valve, that's as close as you are going to get. The rockers on either end of the shaft cannot be moved.
When you put everything back together you will have moved the rockers to better center them over the valves but the side to side clearance will not have changed since the additional shims have a total thickness equal to the amount the sleeves are shorter.
If you have new rockers you don't have to worry about the needles falling out of the cages when you pull the rockers off the shaft. We started using captured needles about two years ago.
Q: Where to buy and what do they fit?
RobbMc: (May 2003) Buy the rockers direct from Erson. Call 775-882-6600 and talk to Steve Tanzi or Tom McGibbon. Tell them that Robb from engineering sent you and that you saw this on the FE forum. They will give you a good price.
The rockers are designed to fit standard and CJ heads. If you are running medium risers or Edelbrock heads you will need to also order the optional spacer kit (about $20).
The rockers will not fit high riser heads.
The rocker stands now clear ARP head bolts but not studs. If you must run head studs you will have to drill holes in the stands for the studs to poke through.
Hold down bolts are not included (stock hold down bolts will work) but the special small diameter AN washers are now included. If you are using aluminum heads you should use studs to hold the rockers down or you may damage the threads in the heads.
All stands are now split to help prevent the shafts from breaking at the bolt holes, however, spring loads over about 800 lbs still make me nervous.
Shafts are now retained near either end by roll pins rather than snap rings. That way if a shaft were to break, the broken end can't walk out the end of the stand and cause a major crash. In fact, even if you break a shaft, you probably won't know it until you pull the rockers off the heads (just in case you really need those 900 lb spring loads).
The rocker bodies will withstand spring loads of around 1200 lbs (depending on rpm and ramp rates).
The bodies are no longer anodized. They are now tumble burnished in the same manner as T&D rockers (T&D is also in Carson City). We now use the same heat treater as T&D for our shafts. Shafts are now made from gun drilled, heat treated, centerless ground 8620 chrome moly steel.
The axles for the roller are now held in place with small clips rather than just pressed in place to eliminate any chance of the axle walking out.
Some of the above changes have actually been in effect for sometime but I just wanted everyone to know all the changes I have made in the last five years. Much of it based on feedback I got from this forum. Thanks to everyone.
Q: Use of Oil restrictors?
RobbMc: The need for restrictors comes from the fact that too much oil can get pumped up into the valve covers; sometimes at a rate faster than the oil can drain back to the pan. The higher the engine is revved, and the longer the engine is held at high rpm, the more desirable it is to restrict the oil to the rocker arms.
Since needle bearing rockers require less oil than bushings or plain aluminum, I think it's a good idea to restrict the oil to the rockers, just in case. A Holley jet with an I.D. of about .080" to .090" seems to work well.
Q: Alternative Sources?
Doug aka pumpbldr: For the Rocker stuff, here is how it goes. First of all, I always have everything on the shelf, ready to go. Second, there are different options, ie, with End supports or regular without. I do give a discount on complete kits when someone buys it all, I just need to add everything up to see what you got then, we can reduce it a little. And for most people, they just piece meal it together, because they already have half of some one else's stuff, so I just price parts individually so everyone can get them. Precision Oil Pumps (559)645-1951
BobS: Dennis at DSC Motorsports has complete assemblies, shafts, split steel stands and end stands. Many pleased buyers for several years.
Or The Rocker Arm Specialist Anderson, CA (530) 378-1075, rocker@czone.net - again with good feed back.
Also Ken Heard at Oregon Cam Grinding, Inc. has rocker arm shaft assemblies using their own stands with Dove Rockers and again good but somewhat limited feed back.
Q: Source for push rods?
(Brian): If ya want quality push rods, I'd suggest Smith Bros Phone # 1-800-367-1533. Made to order, and can ship next day if you need them right away.
Larry: Give CV Products a call. Not sure of their phone number but they are one of the major engine parts supplier to the NASCAR teams. They are very reasonable on their prices, like half what Manley or CompCams charges for their push rods...
Q: Any difference in hot lash settings?
Andy: With standard heads and standard rockers I found no difference. With Edelbrock heads and standard rockers my cold lash was .007" tighter than hot. When I changed to Erson rockers I found this went to .010" tighter when cold ie..022" hot, .012" cold. I check my hot lash at around 190F, individual operating temps may make some difference.
Q: I can not get my valvetrain to stop chattering. This is a hydraulic cam that was running in the car last year with the stock heads and non adujstables rockers and it was as quiet as it should be. This year so far I have put on C6aeR heads with 2.15 intake and 1.65 exhaust valves (no interference) and adjustable rockers, I had a problem with those rockers not getting enough oil through them even with no restrictors, hence thats where I thought the chatter problem was, lack of oil. So I bit the bullet and bought the Erson Rollers like I had planned to at first, I installed and adjusted as per Sprowl's website and the way it says to in the FE book, I can now do it with my good arm tied behind my back and an allen wrench in my mouth, blindfolded. Yet to my horror these things STILL sound like fifteen Singer AutoStichers. What am I doing wrong? Oh yeah and even though I re-installed the restrictors, the valves are now swimming In a 10W-30 bath. So no lack of oil. HELP!!!!
Kevin: You want to turn th engine to 45 degrees past TDC (half way to # 5 TDC). The old balancers had a double XX where this was. This is the point that there is the least amount of loading on the cam. I get them in place, and draw each bolt about a 1/4 turn at a time, till snug, then torque in increments. Be careful with the drip trays, as they tend to get curled where a thread catches, pulls them. I like a little "Gaskacinch" on both sides to keep any oil pressure from escaping. You may have to fudge them all around a hair to keep the pushrods from any contact with the intake throughout their travel, as well as the baffles from touching anything.
This is very important. I set lash on all cylinders at TDC. Two revolutions, and its good. Then, go back and do it again, and check again when hot. The cam is never centered in the bearings, and this can change when checked two or three times.
Wayne: You are going to do this with the engine OFF. Rotate your engine around to #1 cylinder TDC and make SURE that you are on it's compression stroke (TDC). That should read 0* on your balancer with pressure coming from the empty spark plug hole as you rotate it into position. At this point you can install both pushrods for cyl #1. Tighten each adjuster while carefully "feeling" the pushrod for resistance. Stop tightening the adjuster as soon as you you reach the INSTANT of positive contact between the adjuster and the lifter plunger. Then tighten the adjuster an additional 1/8th to 1/4 turn. Do both intake and exhaust this way for that cylinder.
It's best (for me) to mark the balancer with a small dab of white rtv to make this part easier. Rotate your engine exactly 90*. Now adjust the next cylinder in your firing order in the same fashion as described above. Turn your crank 90* more and do the same thing to the next cylinder in your firing order, and so on...
I know some of you out there have shortcuts to this procedure, but believe me Keith, this method is foolproof if done exactly like described. I've tried them all, and although this way of adjusting your valves/rockers isn't the last word on setting them up, it will get you DAM_ close. Like I've said, I've bunches of hydraulics this way (and solids too but with lash of course). If you still have lots of noise after doing it this way, you had better let someone who really knows their stuff have a look at it because it should be as quiet as a mouse.
I wonder if you have any oil pressure to your lifters ... That would account for lots of clatter (had that happen once).
Louie: Let me add one thing to Wayne's post ... instead of the twisty feely thing then a 1/4 to 1/8, bleed down the lifter and set the gap at .12 - .20.
BobS: The lifter has the range Louie gave and therefore you can go a couple of turns to get to the midlle of the lifters travel. If it still isn't quiet then something else is wrong.
Q: I'm having a hard time finding the correct lash setting for my solider lifter cam. It always seens noisy with the recommended lash setting. What can I do?
BobS: Tighten them down in steps of about about 0.004 until they get quiet or almost quiet. Try driving it and see how it runs and performs. Usually it will be OK but sometimes you will need to back it off 0.002 or even 0.004 to find the sweet spot. You can actually hear a miss at idle if they are too tight and you will find that the power is off when you drive it. You need to drive it with the first setting that you think is close and then make an educated guess as to where you are at.
Fine tuning with that last set of adjustments is what works and of course takes the real time.
You may discover that it is really only the intakes or the exhausts that are too loose. This would be because the material they are made of is expanding at a different rate (less) and that's the problem.
Therefore you can try tightening either the intakes or exhausts as above if you think that might the issue in your case.
Beware that the exhaust valves can be burned it they are too tight. It will seem to be OK, but don't overtighten the clearance. Stop as soon as they are quiet.
NOTES: I'll add additional photos of the assemblies and reference phone numbers, etc, when I can find them or if the vendor will send them to me. I wiould prefer photos that are not on-line at the vendors site so those of you with digital cameras help me out here.
I really don't know of any bad products. Almost every feed back was positive. Availability was the issue that generated the only negative comments.